

The third cleaner is usually where a stubborn mark becomes an expensive experiment. The dull patch is still there, so ordinary household logic says to add more strength, more pressure, or both. But when the finish, coating, or material itself has changed, cleaner is not too weak. It has the wrong job.
A surface can also be dirty and damaged at the same time. Removing grease may reveal a scratch underneath, and lifting a water deposit may leave a worn finish more visible. That is not failed cleaning. It is a better diagnosis than the one you started with.
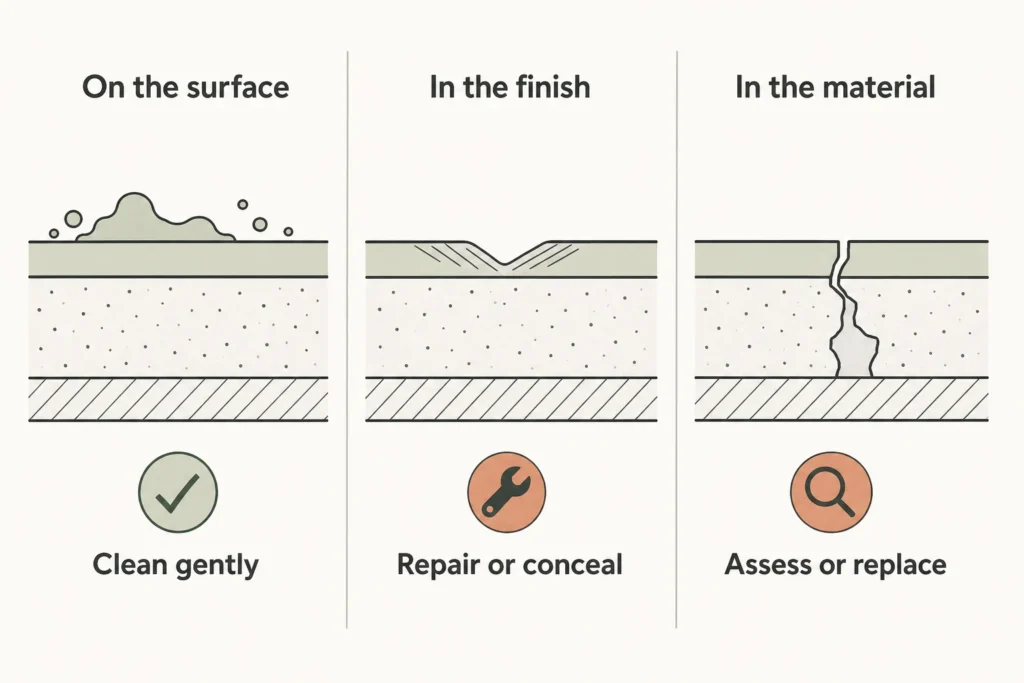
- Identify the material and visible finish.
- Run one small test using a method approved for that surface.
- Let the area dry before comparing it.
- Use the result to choose cleaning, repair, protection, replacement, or help.
A surface can be clean and still be worn
Cleaning has a limited but useful job: remove accessible soil without changing what is underneath. It cannot refill a scratch, replace a peeled coating, reverse fading, flatten swollen wood, or restore material removed by etching. Asking it to do those things usually produces more scrubbing, not more progress.
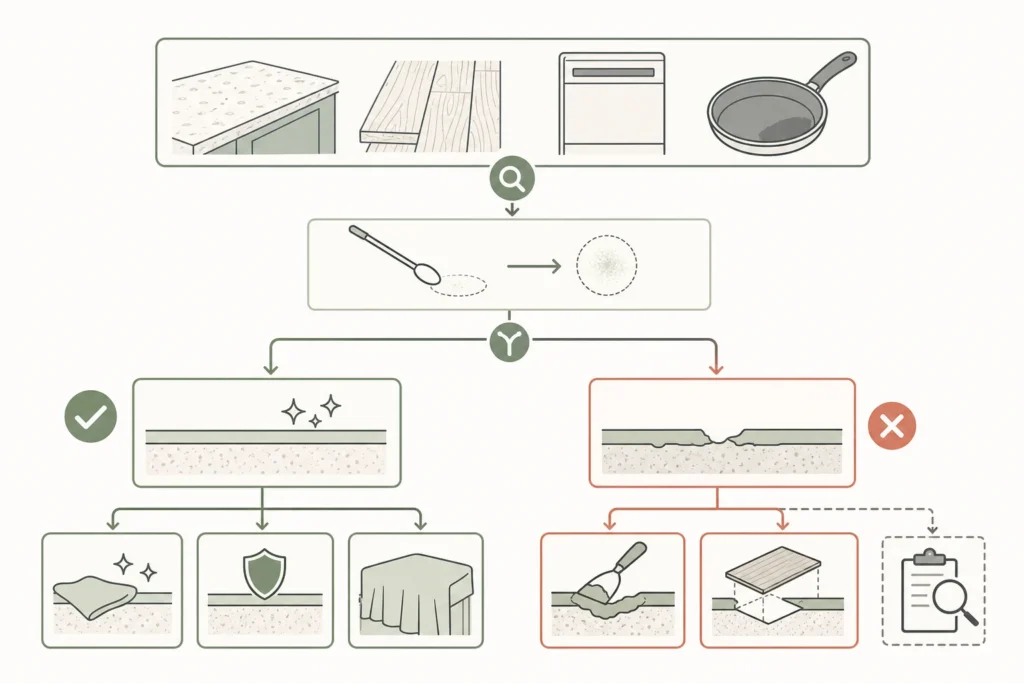
Physical clues can point toward damage: a line you can feel, a dull area that stays fixed as the light changes, peeling edges, flaking, cracks, swelling, or an exposed layer beneath the finish. None of these observations diagnoses every surface from sight, but they are good reasons to pause before reaching for an abrasive pad.
Identify the material before choosing the cleaner
Start with the visible layer, not the room where you found it. A kitchen surface might be polished stone, engineered quartz, ceramic glass, coated metal, wood veneer, laminate, or nonstick coating. Even familiar labels are incomplete: honed and polished stone behave differently, while traditional stainless steel and fingerprint-resistant finishes may have different care limits.
Model-specific guidance outranks a universal cleaning hack because coatings and constructions vary even within one product category. This is mildly inconvenient, but much less inconvenient than discovering that the clever homemade paste also removed the sheen.
Use one small cleaning test, then let it dry
Treat the first cleaning attempt as a controlled test, not the opening round of a product tournament. Changing the chemical, tool, pressure, and amount of water together makes the result harder to interpret and increases the chance of damage.
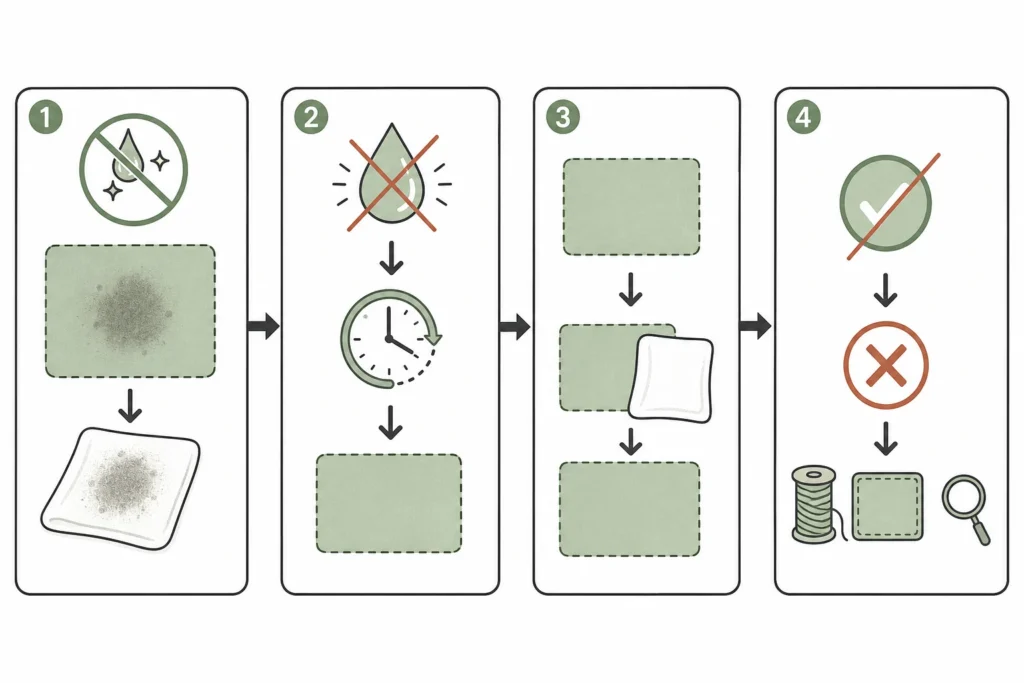
- Remove loose dust or grit with the gentlest dry method allowed for the item. Grit beneath a cloth can turn wiping into abrasion.
- Choose an inconspicuous patch. Apply only a mild or manufacturer-approved cleaner with a nonabrasive cloth, sponge, or tool permitted for that surface.
- Wipe or rinse away residue if the care instructions require it, then dry the patch fully. A wet surface can temporarily hide dullness and fine scratches.
- Compare the dry patch with the surrounding area in the same light. Do not move immediately to a stronger chemical or rougher tool.
A small test reduces uncertainty, but it is not a guarantee that every treatment will be safe across the whole item. Its real value is narrower: it tells you whether ordinary cleaning has earned another pass.
What the dry result means
| Result | Likely meaning | Next move |
|---|---|---|
| The patch improves or soil transfers to the cloth | Removable residue is at least part of the problem | Continue the same approved method in small sections |
| It looks better only while wet or freshly polished | Moisture or shine is masking the appearance | Judge it dry; do not call it restored |
| There is no meaningful change | The test did not support an ordinary dirt diagnosis | Stop escalating and consider repair, concealment, or assessment |
| There is peeling, cracking, swelling, delamination, or loose material | The surface has a physical or moisture-related problem | Protect the area and seek manufacturer or professional guidance |
No improvement does not prove that the change is permanent. It does prove that repeating an unverified method with more force is not justified. A clean, unchanged test patch is evidence, and sometimes it is the most useful result you will get at home.
Read four familiar surface problems correctly
On natural stone, a stain and an etched patch are different problems. A stain may involve material absorbed into the stone, while an acidic spill or incompatible cleaner can alter the finish of acid-sensitive stone and leave a dull area. Cleaning does not replace that finish; etched areas may require professional refinishing or repolishing.
On hardwood and veneer, loose grit and fresh spills belong to cleaning. Scratches, sun-related color change, worn finish, and swollen edges do not. Excess water, steam, harsh chemicals, and abrasives can worsen wood or its finish, and sanding unfamiliar veneer is especially risky because the visible wood layer may be thin.
On appliance metal and ceramic-glass cooktops, fingerprints, food film, and some deposits may respond to compatible care. Scratches and damaged specialty coatings need restraint instead. Whirlpool's guidance varies by finish and warns against abrasive materials on relevant products, which is a useful reminder that “stainless” is not one universal cleaning surface.
On nonstick cookware, soften and remove stuck residue only by the nonabrasive method approved for that product line. A scratch cannot be scrubbed back into coating. Do not guess about continued use or replacement from generic advice; check the cookware maker's use, care, and warranty guidance for the exact item.
Choose the next action that fits the evidence
- Clean when the approved test improves the area without changing its texture, color, or sheen.
- Repair or refinish when the material is sound but its finish, color, or shallow surface layer has changed. The method must match the actual construction.
- Protect or conceal a stable cosmetic change when invasive work is not worthwhile. Compatible pads, rugs, or manufacturer-approved touch-up options can be sensible choices.
- Replace when a coating or component is failing, practical repair is unavailable, or the maker says the damage compromises intended performance.
- Call for assessment for valuable materials, etched stone, deep gouges, delamination, recurring moisture, warping, loose surfaces, or a finish you cannot identify.
Prevention should match what you found. Reduce tracked grit around wood floors, wipe compatible surfaces promptly after spills, keep standing moisture away from seams, and use pads, trivets, and cutting boards where friction or heat caused the change. Prevention is useful when it addresses the mechanism, not when it becomes a ritual performed over an already damaged patch.
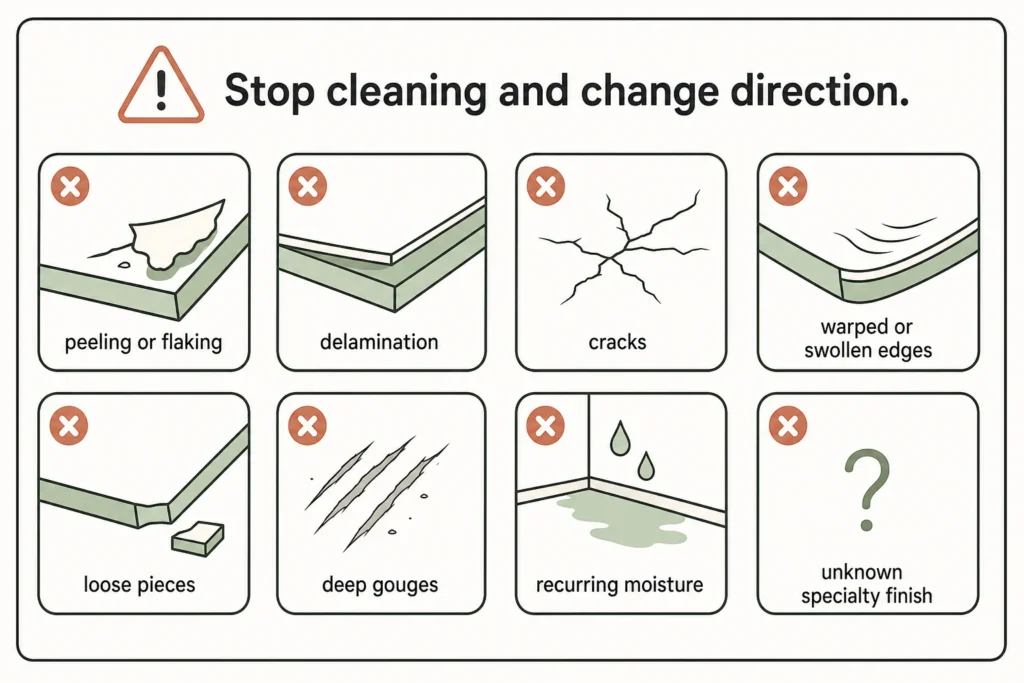
Stopping after one fair, low-risk test is not neglect. It is the point where you stop asking cleaner to perform restoration and choose the proportionate response instead. That judgment can save the surface, the budget, and another evening spent fighting a mark that was never going to wash away.
Sources and references
- Natural Stone Institute: Natural Stone Institute, Care & Cleaning of Natural Stone
- Shaw Industries Group, Inc.: Shaw Floors, Hardwood Care
- Whirlpool Corporation: Whirlpool, How to Clean and Care for Stainless Steel Surfaces
- Whirlpool Corporation: Whirlpool, WipeClean Glass Cooktop Cleaning
- Herman Miller, Inc.: Herman Miller, Wood & Veneer Care and Maintenance (2020-08)
- Calphalon: Calphalon, Cookware Use & Care
- Caesarstone Ltd.: Caesarstone, Care and Maintain for Fusion, Mineral & Quartz Surfaces