

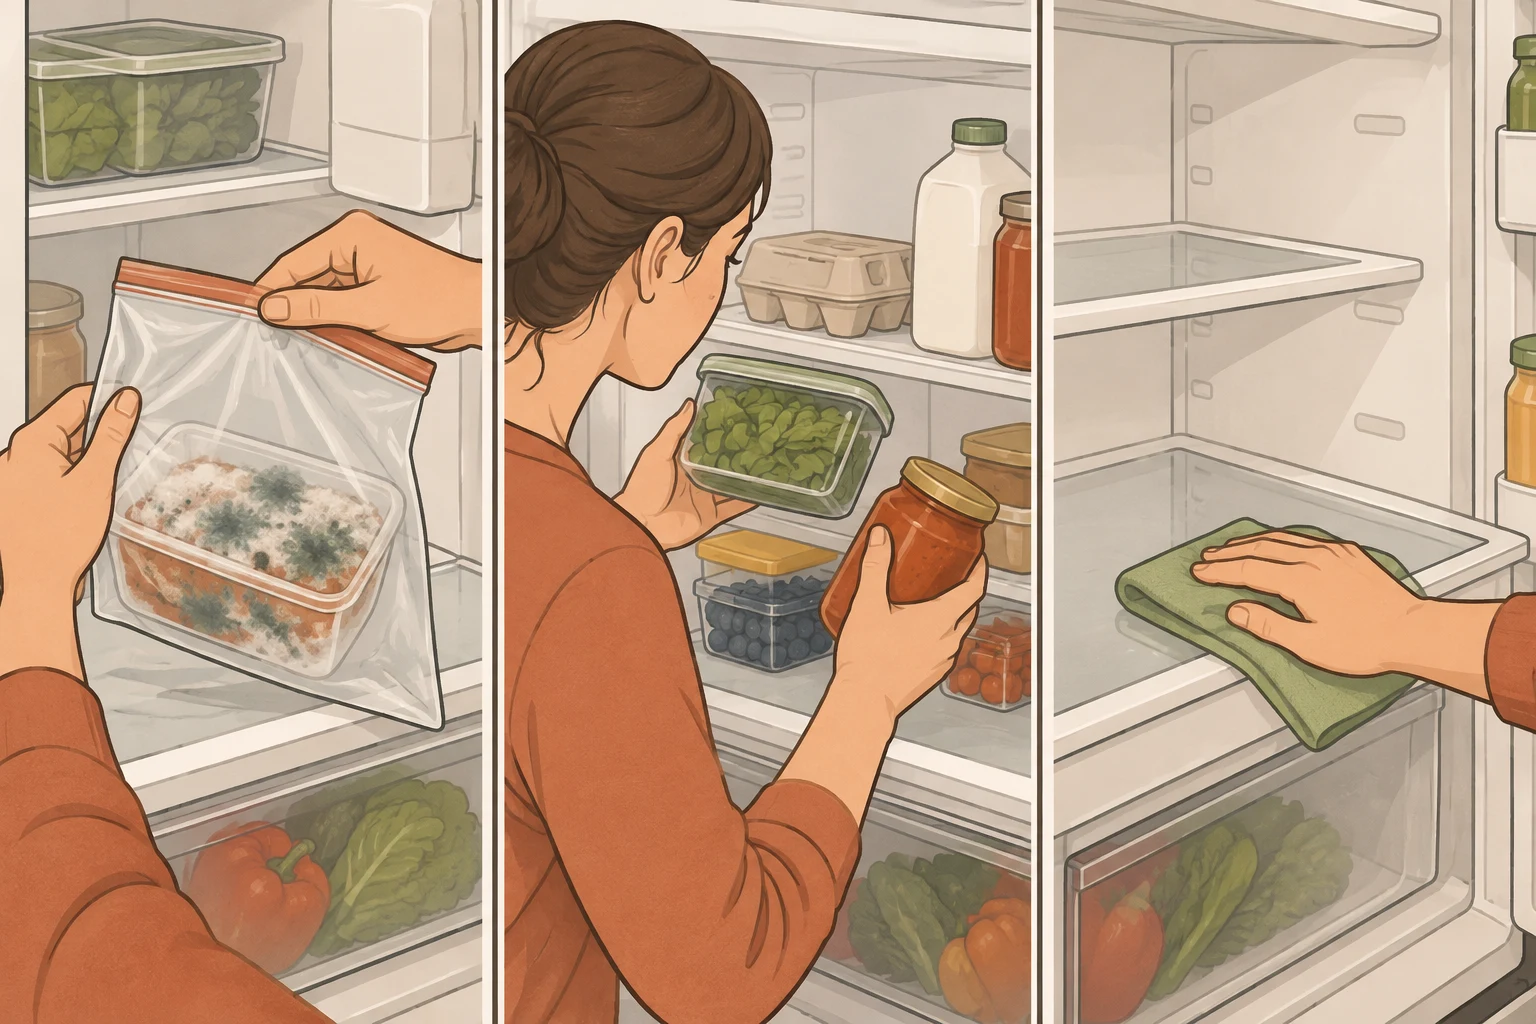
Wrap or bag food you’re discarding and put it in a covered trash container, away from groceries you’re keeping. The no-sniff advice matters: USDA warns that sniffing moldy food can cause respiratory trouble.[1][2]
The food matters more than the size of the spot
I understand the temptation to remove one fuzzy corner and keep dinner. But the visible patch isn’t necessarily the full extent of contamination. Mold can reach below the surface, and bacteria may be present alongside it. USDA’s trimming exceptions apply to particular dense foods; they don’t transfer to softer foods or a different form of the same ingredient.[1][2]
| Food | What to do | Why the distinction matters |
|---|---|---|
| Hard cheese block, with mold not intended as part of production | Cut off at least 1 inch around and below the mold. Keep the knife out of the mold, then use fresh wrapping. | The exception applies to the dense block, not shredded, sliced, or crumbled cheese. |
| Soft cheese; sliced, shredded, or crumbled cheese; yogurt and sour cream | Discard. | Contamination can extend below the surface; cutting forms can also distribute it. |
| Firm, low-moisture produce, such as cabbage, carrots, and bell peppers | For a small mold spot, cut at least 1 inch around and below it, keeping the knife out of the mold. | Dense, low-moisture produce is harder for mold to penetrate. |
| Soft produce, such as berries, peaches, cucumbers, and tomatoes | Discard the moldy item. | High-moisture foods may be contaminated below the visible surface. |
| Bread and baked goods; cooked leftovers, meat, casseroles, pasta, and grains | Discard. | Porous or moist foods aren’t covered by the trimming exceptions. |
| Jam and jelly; peanut butter, legumes, and nuts | Discard. | Removing the visible patch is not USDA’s recommended salvage method. |
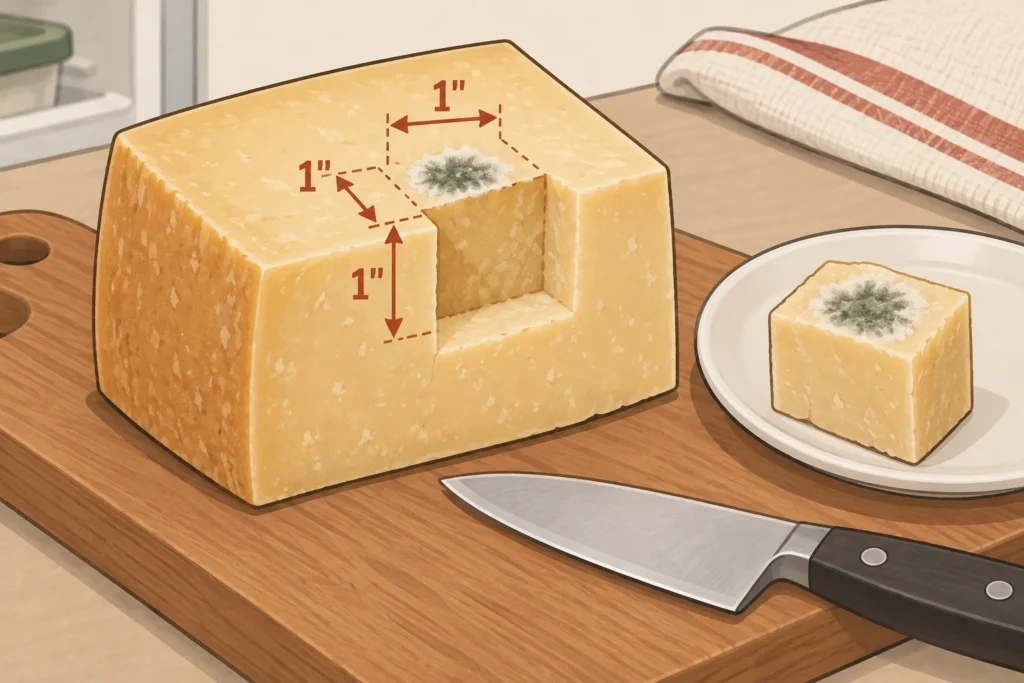
If you are permitted to do trimming, do a one inch trim from the mold away from the food, and include some depth below the surface. The one inch margin is a good benchmark to go by. If the food is smaller than that, then the exception is moot. Cheeses deliberately made with mold have separate guidelines.
If food is made with deliberately added mold, this isn’t a reason to discard it.[1][2]
Look at contact, not an imaginary contamination radius
Let’s imagine I’m trying to lift a crowded berry container out of a drawer and a container of unopened yogurt beside it is getting in the way. There’s also a fuzzy berry at the bottom. I’m tempted to just clean out the whole lot to get this over with, but breakfast isn’t cheap. I move the yogurt container aside and break this down into two questions. First, which fruit came in contact with the moldy berry and second, what contacted the package or drawer?
With fruit in a shared container, the USDA says to discard the moldy fruit and any fruit that is in contact with it. You can keep the remaining fruit that isn’t mushy and doesn’t have mold and wash it, then eat it.[3]
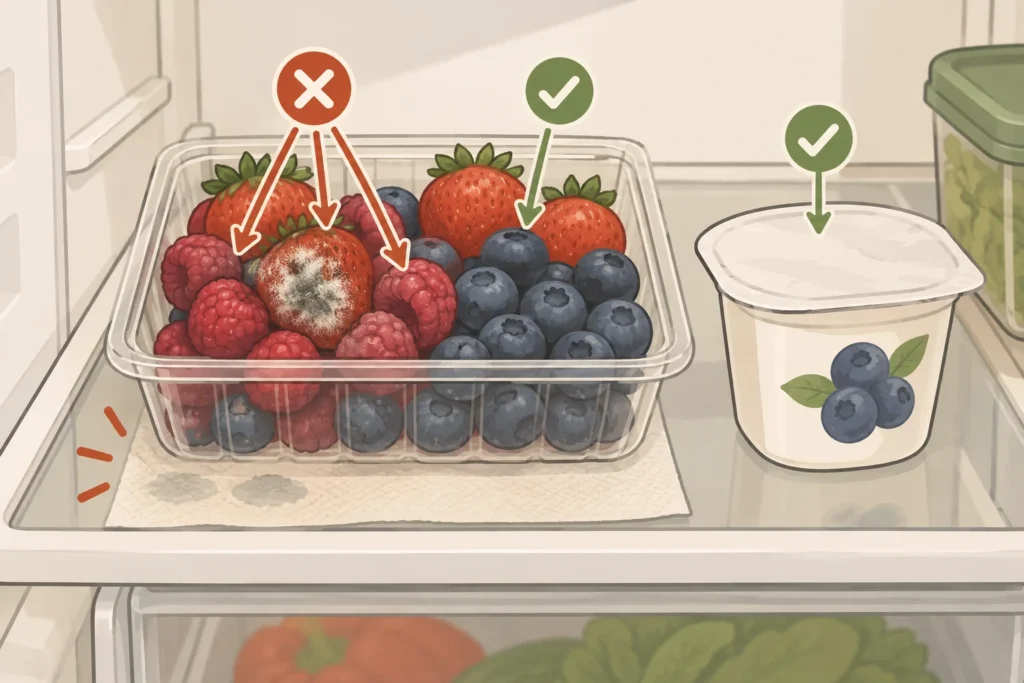
Check surrounding food, the bottom of food packages, and the shelf or drawer where liquid or debris has reached. An intact closed package is not the same as food that is exposed and touching the moldy item. You should look for mold, leakage, or damaged packages. The reason I wouldn’t draw a contamination circle around the original item is that the cited guidance gives no set inspection distance, and closeness alone does not mean that the package’s contents are contaminated.[1][2][3]
While you clean, keep retained perishables in another refrigerator or an iced cooler at 40°F or below. FDA’s room-temperature limit is two hours, or one hour above 90°F, and time spent cleaning counts toward that limit. A clean shelf doesn’t reset the food’s storage history.[5][8]
Choose the cleaner for the refrigerator, not the mold
I’d settle the cleaner question before taking anything apart or putting anything in solvent. Look up your precise model for interior care instructions. It should list which parts are removable and acceptable solvents and which chemicals to avoid. There’s a real conflict with the USDA’s general mold guidance, which recommends using a bleach solution to clean refrigerator cases, versus the prohibition for use of bleach on the affected materials in the Whirlpool manual. In GE’s food mold guidance, they recommend not to use bleach and detergents, and to use a baking soda solution instead. Even using dish soap is not recommended for all cases.[2][4][6]
If your model permits the use of mild detergent, use a sponge, rinse, and dry. Whirlpool document W11409849 Rev. A describes this method, though it may not be applicable to your refrigerator. A mold claim on a product can’t override the materials of your appliance. Never combine cleaners and use products as directed on the label.[4][7]
- If your model requires it, disconnect the power. Remove only the parts intended for owner removal. Do not attempt to pry any seals, vent covers or assemblies apart.
- Do not assume that all shelves and drawers are dishwasher safe. Let glass shelves warm up prior to washing to prevent breaking.
- Wipe affected accessible surfaces, including the food shelf surface, corners of drawers, and folds of gaskets with residue or mold present. Damp cloth. Do not pour or spray liquid into seams, vents, or controls.
- Rinse as directed in the care instructions, dry the surfaces, put the parts in their correct position, and restore the power. Return retained food when the cold storage is restored.
A remaining mark isn’t an instruction to scrub harder
Remove residue and growth rather than trying to clean mold with a chemical to kill mold. EPA stated that staining might remain after mold is removed, so it might not be necessary to restore the original color. I wouldn’t use a stronger chemical because a dark mark is remaining. That dark mark might be staining or damaged material rather than mold.[9]
When affected accessible surfaces are washed with a permitted method, and residue is removed, and rinsing is done and surfaces are dried and cooling is restored, note any discoloration and compare it to mold. This is a good place to stop. This is not to certify food safety. A nice smell or normally looking food doesn’t mean that food is safe to eat. Don’t taste the food.[4][9][10]
If mold returns, look farther through the interior for missed food residue rather than repeatedly wiping the same surface. The same is true for moisture. Mold that is inside a fixed seal or inside an inaccessible assembly needs to be addressed differently, contact appliance service for assistance. More cleaner might enter parts that are inaccessible and can’t be rinsed or dried and you can’t verify removal of mold.[5][6][9]
Sources and references
- USDA Food Safety and Inspection Service: Molds on Food: Are They Dangerous? ([fsis.usda.gov](https://www.fsis.usda.gov/food-safety/safe-food-handling-and-preparation/food-safety-basics/molds-food-are-they-dangerous?utm_source=openai))
- USDA FSIS; hosted by Gallatin City-County Health Department: USDA mold guidance, archived agency handout ([healthygallatin.org](https://www.healthygallatin.org/wp-content/uploads/2013/04/FSHmold.pdf)) (2010-03)
- USDA FSIS: What if I find moldy fruit in a container with other fruit? ([ask.fsis.usda.gov](https://ask.fsis.usda.gov/article/What-if-I-find-moldy-fruit-in-a-container-with-other-fruit?utm_source=openai)) (2024-10-01)
- Whirlpool: Whirlpool refrigerator owner’s manual W11409849 Rev. A ([whirlpool.com](https://www.whirlpool.com/content/dam/global/documents/201912/owners-manual-w11409849-reva.pdf))
- Whirlpool: Cleaning the Interior of the Refrigerator ([producthelp.whirlpool.com](https://producthelp.whirlpool.com/Refrigeration/Full-Size_Refrigerators/Product_Info/Cleaning_and_Care/Cleaning_the_Interior_of_the_Refrigerator?utm_source=openai))
- GE Appliances: Refrigerator, Food Molds ([products.geappliances.com](https://products.geappliances.com/appliance/gea-support-search-content?contentId=17412))
- US Environmental Protection Agency: Homeowner’s and Renter’s Guide to Mold Cleanup After Disasters ([nepis.epa.gov](https://nepis.epa.gov/Exe/ZyPURL.cgi?Dockey=P1019OUZ.txt&utm_source=openai))
- US Food and Drug Administration: Refrigerator Thermometers, Cold Facts about Food Safety ([fda.gov](https://www.fda.gov/food/buy-store-serve-safe-food/refrigerator-thermometers-cold-facts-about-food-safety))
- US Environmental Protection Agency: A Brief Guide to Mold, Moisture and Your Home ([epa.gov](https://www.epa.gov/mold/brief-guide-mold-moisture-and-your-home?pfrom=mailchimp))
- Rutgers New Jersey Agricultural Experiment Station: Help! My Refrigerator or Freezer Stopped Working. Is My Food Safe? ([njaes.rutgers.edu](https://njaes.rutgers.edu/FS1178/?utm_source=openai))