

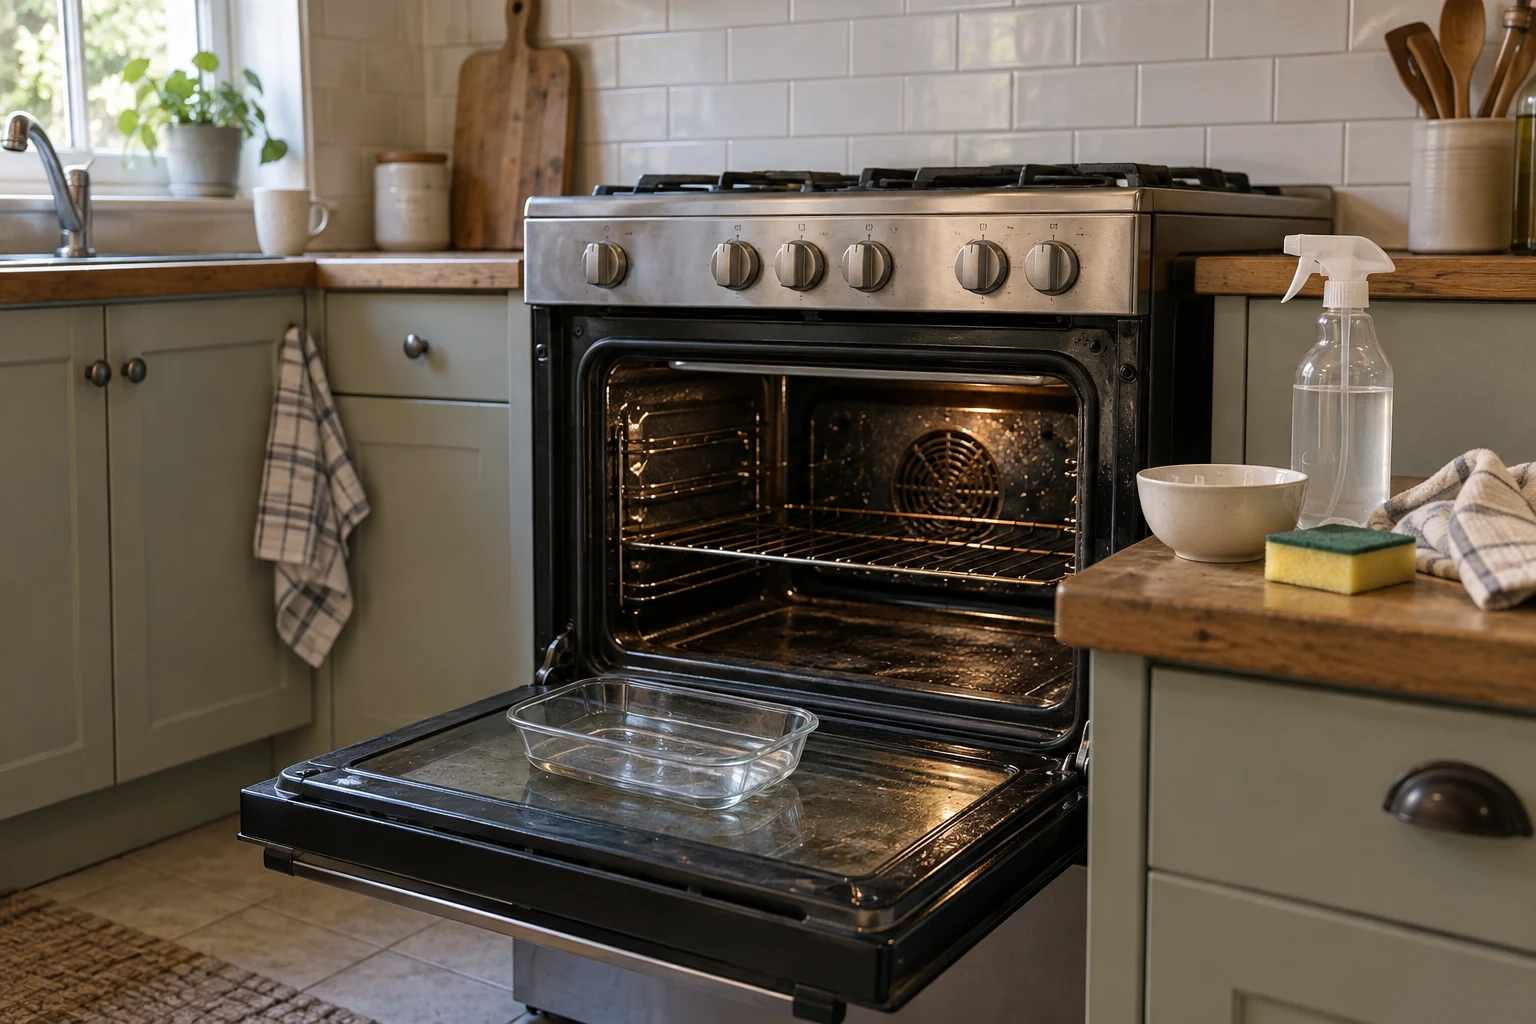
Use the method your particular model of oven permits: Steam clean if the soil is light and needs loosening, use the high temperature self-clean if the buildup is heavy and baked on, and if your model permits, hand clean locally. I’m not a big fan of choosing a method based solely on the cleaning buttons. Each method leaves you with some work, and a good method can still be a poor fit with your household today.[1][2][3][4]
Imagine I’m looking at a baked-on casserole spill with dinner due in two hours. One browser tab says to leave the racks in; another says to remove them. I’m annoyed before I’ve even picked up a cloth. Rather than gamble on the clean button, I find the model’s cleaning instructions and check whether a small hand-cleaning job can get the oven usable without tying it up for the evening.
The model number settles more than the brand name
For the model number on your appliance, refer to your purchase paperwork or the appliance label and find the matching owner’s manual. If the booklet covers several models, look for “on some models.” I don’t want you to prepare for a steam clean job, only to discover the section is dealing with a feature your model doesn’t have.[2][3]
The Whirlpool model manual gives 12 ounces of distilled or filtered water for a 40-minute steam cycle. The GE family manual gives 1/2 cup for a 30-minute cycle. However, the GE general steam-clean page says 1 cup. The examples differ from the directions for your oven, and when general support and the model manual give conflicting information, use the model manual. Averaging water amounts doesn’t resolve it.[2][3][4]
It’s the same with oven cleaners. The Whirlpool manual states not to use oven cleaners, and the GE manual limits use of oven cleaners certified for use in self-cleaning ovens. The GE allowance does not apply to your oven. If your manual allows use of oven cleaner, use it only for the surfaces specified, and only when conditions given on the cleaner’s label are met.[2][3]
Match the work to the spill
High-temperature self-cleaning turns food soil into powdery ash that is removed after the oven has cooled. Steam cleaning loosens lighter soil and requires you to remove it along with the leftover water. If hand cleaning is allowed, you use products and tools permitted for that surface, and the button does the work for you. The button changes what part of the work the oven does for you.[1][2][3][4]
I’d try permitted hand cleaning on a small, accessible spill before tying up the whole oven. Light splashes are better candidates for steam than more widespread splatters baked through several meals. A dark mark doesn’t always mean a spill is removable, and manufacturers don’t give a universal cutoff for thickness or area, so you may not know for sure if a spill is removable. Loose food and grease should always be removed prior to cleaning. Large, removable food spills should be removed prior to running the self-cleaning cycle.[1][2][3][4]
| Method | Suitable soil | Preparation | Total downtime | Finish / defer when |
|---|---|---|---|---|
| High-temperature self-clean | Substantial baked-on food soil | Remove loose food, excess grease, and contents. Apply model-specific rack rules. | Cleaning plus cooling and wiping. Cited Whirlpool settings: 2-4 hours. | Wipe cooled ash. Defer if ventilation, access, bird precautions, or cooking plans cannot accommodate it. |
| Built-in steam clean | Light soil | Remove specified items. Use the prescribed starting conditions, water amount, and location. | Cited cycles: 30 or 40 minutes, plus preparation and finishing. | Wipe soil and water. Use another supported method for resistant deposits, not improvised additives. |
| Permitted hand cleaning | Localized spills and separately cared-for areas | Cool the oven. Choose products and tools permitted for the surface. | Variable labor and any product-label treatment time. | Remove soil and cleaner residue. Defer incompatible treatments; don’t keep escalating against an unchanged mark. |
Can the kitchen accommodate the cycle today?
Not all kitchens can withstand high temperatures. You need adequate kitchen ventilation, unobstructed oven vents, and ways to keep kids and pets away during cleaning and cooling. If your kitchen can’t meet those conditions, run a self-cleaning cycle, use permitted hand cleaning, or postpone the cycle. I wouldn’t treat an open window as proof that all household constraints are solved.[1][2]
For pet birds, ventilation isn’t the only constraint. Whirlpool states that self-cleaning fumes can be toxic to birds, and advises you to move the birds to another closed, well-ventilated room. If your kitchen can’t meet the bird constraint, don’t run the self-cleaning cycle.[1]
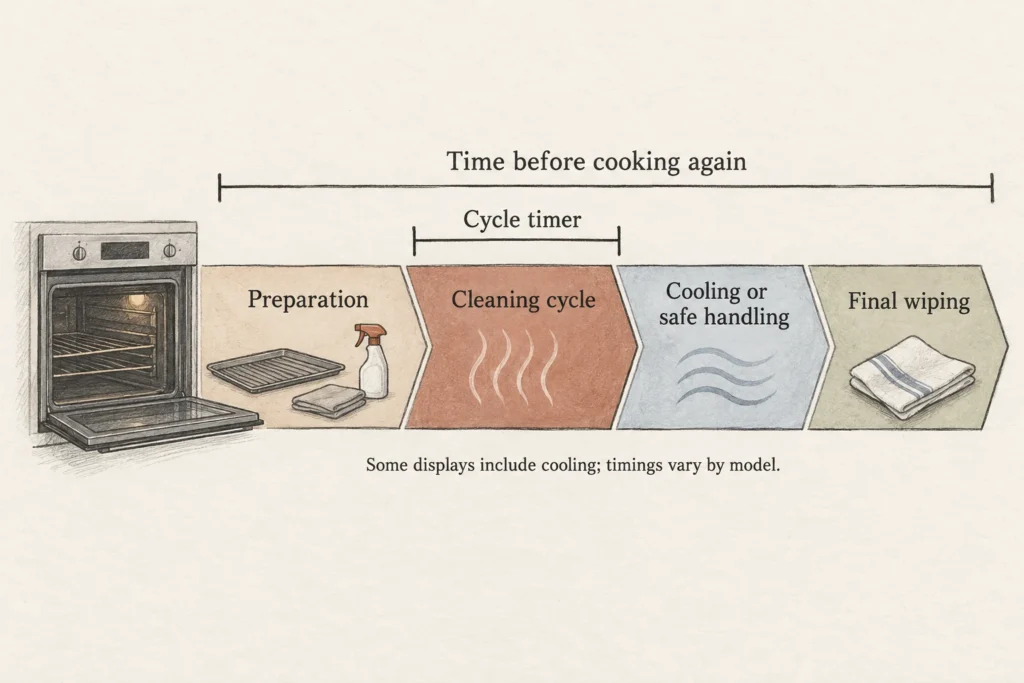
Counting backward from when you need to cook takes into account preparation time, clean up time, cool down time, and final wipe down time. The Whirlpool manual you cite also describes cooktop lockout on some models, meaning dinner on the burners may not be your fallback. GE describes self-clean cooldowns of 30-90 minutes, which, again, is not a promise for yours. The door lock remains engaged until the release temperature is reached, not just until the cleaning timer is up.[2][6]
Clean the cavity, not every component the same way
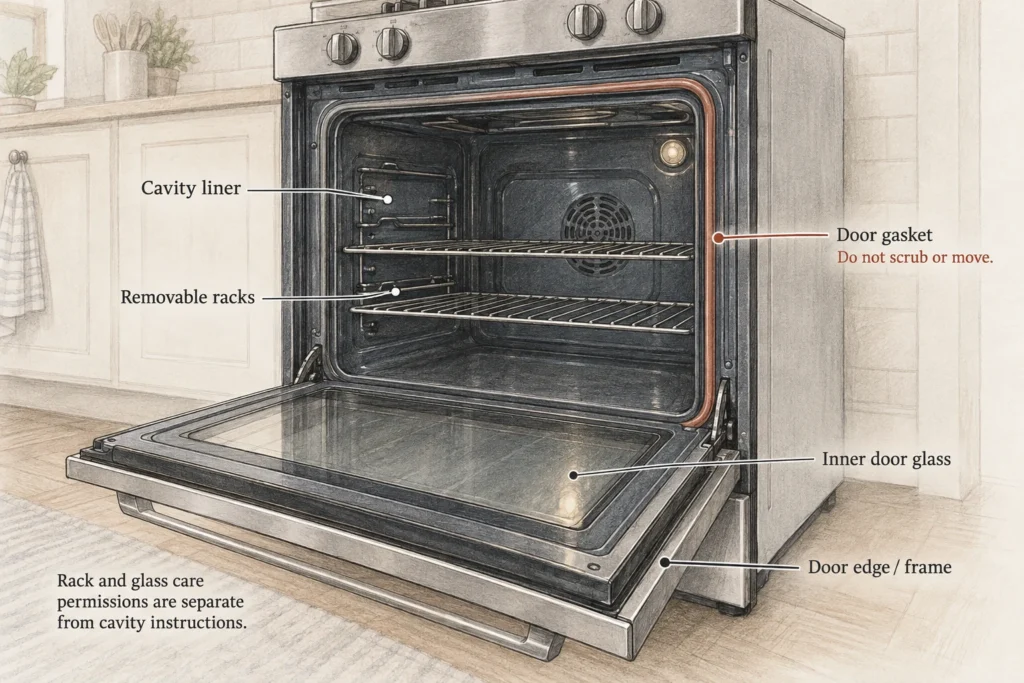
The cavity setting doesn't inform you how to take care of the items inside it. After removing excess dirt and grease, you may prep the cavity for the required method. For the built-in steam clean, this means using the prescribed volume of water in the prescribed location, not a homemade steam clean using a bowl of water, and not using cleaner.[1][2][3][4]
Racks are where conflicting advice often starts. Whirlpool’s high-temperature guidance calls for removing them. GE allows explicitly designated no-scrub or self-clean racks to stay in. I’d identify the rack type and its applicable instructions rather than assume an ordinary rack can tolerate the cycle just because it fits the oven.[1][5]
Door glass, edges, and seals need different treatment again. Cooler door-edge and frame areas may need separate hand cleaning, and glass has its own permitted products and tools. Let hot inner glass cool before touching it with a damp cloth. Leave the gasket alone: rubbing or moving it treats a working seal as a dirty seam, which is exactly what the manufacturer warns against.[1][2][3]
Judge what remains before doing more
Once the prescribed cooling or handling period is over, wipe away the ash, leftover steam-clean water, or loosened hand-cleaning residue. You’re looking for an oven without loose food, grease, ash, standing water, or cleaning-product residue, not necessarily spotless porcelain. The manuals acknowledge that discoloration or surface changes can remain. I’m glad of that distinction: a permanent-looking mark shouldn’t commit you to another afternoon of scrubbing.[1][2][3][4]
Raised, greasy material or residue that transfers to a cloth gives you a better reason to try another permitted treatment than color alone. Before repeating a heat cycle, check its repeat restriction. The cited Whirlpool manual prohibits another self-clean cycle within 24 hours once cleaning temperature has been reached. That belongs to the applicable models, not to a universal cleaning schedule.[2][3]
To stop a self-cleaning cycle use the cancel control and allow it to cool. Forcing the latch will damage it. If the oven is still locked and fully cooled then use the door-lock troubleshooting instructions. If that doesn’t unlock it, then you need service. Do not try a second self-cleaning cycle to see if that works.[2][6][7]
It's no longer a stain-removal problem to have broken glass, a damaged seal, loose lining material, a self-cleaning cycle that doesn't work properly, or a cycle that doesn't stop. You should stop using the oven, and contact the manufacturer for service. If the oven is in the self-cleaning mode and won't stop, and you can do it safely, use the control to turn it off. Keep people and pets away from the oven until you can get service. Don't move the oven to reach the plug. The service person will want to know what you think is wrong with the oven, if there are error codes displayed, and if the oven has cooled. Those will help the service person, but they can't actually use them to determine that the oven is safe to use.[1][3][7]
Sources and references
- Whirlpool: High Temperature Self-Clean Cycle Information
- Whirlpool: Whirlpool Owner's Manual W11640308 Rev. E
- GE Appliances: GE Gas Ranges 600/700 Series Owner's Manual, 49-2001193 Rev. 5 (2025-01)
- GE Appliances: Range & Wall Oven, Steam Clean
- GE Appliances: Range & Wall Oven, What to Remove Before Self-Cleaning
- GE Appliances: Range & Wall Oven, Explanation of Self-Clean Oven Cool Down
- GE Appliances: Range & Wall Oven, Door Will Not Unlock After Self-Cleaning